
Applying to college in the United States is an exciting milestone, but it can also feel overwhelming. With multiple deadlines, required documents, essays, test scores, and financial aid forms, it is easy to miss an important step. Many students do not struggle because they are unqualified. They struggle because the process is not organized.
A college application checklist helps you stay on track and submit everything correctly, on time, and with confidence. Whether you are applying as a high school senior, a transfer student, or an international applicant, this complete USA college application checklist will guide you through every step.
Why You Need a College Application Checklist
The U.S. admissions process is not the same for every college. Some schools require essays, others require supplemental questions, and many have different deadlines for scholarships, housing, and financial aid. A checklist ensures you do not forget key requirements and helps you manage your time effectively.
When you follow a structured checklist, you reduce stress and improve the quality of your application. You also increase your chances of receiving strong financial aid and scholarship offers.
Step 1: Choose Your College List the Smart Way
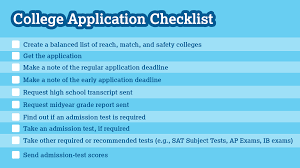
Before you start filling out applications, you need a well-balanced college list. A strong list usually includes a mix of safety schools, match schools, and reach schools.
Safety schools are those where your academic profile is stronger than the typical admitted student. Match schools are where your profile aligns closely with accepted students. Reach schools are more selective and may be difficult even for strong applicants.
Building a balanced list is one of the most important parts of the application process. It ensures you will have real options in the spring, not just hopes.
Step 2: Understand Each College’s Requirements
Every college has slightly different admissions requirements. Even if two schools accept the same application platform, they may require different documents.
You should review each school’s admissions page and note whether they require standardized tests, recommendation letters, supplemental essays, portfolios, interviews, or additional forms for scholarships.
This step prevents the most common application mistake: submitting incomplete materials.
Step 3: Create a Deadline Calendar
College admissions is heavily deadline-based. Missing a deadline can result in automatic rejection, even if your application is strong.
You should organize deadlines for Early Decision, Early Action, Regular Decision, and Rolling Admissions. You should also track deadlines for scholarship applications, financial aid forms, housing applications, and honors programs.
A clear calendar helps you avoid last-minute pressure and improves your final results.
Step 4: Prepare Your Academic Information
Most applications require detailed academic history. You will need your high school transcript, current GPA, class rank if available, and a list of courses you have taken.
If you are a transfer student, you will need college transcripts and sometimes high school transcripts as well.
Make sure your academic records are accurate. If you notice errors in your transcript, contact your counselor or registrar early.
Step 5: Request Official Transcripts
Many colleges require official transcripts sent directly from your school. Some allow self-reported grades at first, but official transcripts will still be required later.
Request transcripts early. Schools and counselors may take time to process them, especially during peak application season.
Transfer students should also request transcripts from every college they attended, even if they only took one class.
Step 6: Decide on SAT or ACT Strategy
Many U.S. colleges are test-optional, but standardized tests can still be helpful for some students. Strong SAT or ACT scores may improve your chances at competitive schools or help you qualify for scholarships.
If you plan to submit test scores, schedule your test early enough to allow time for retakes. If your scores are not strong, consider applying test-optional where appropriate and focus on strengthening other parts of your application.
Always check each school’s testing policy before deciding.
Step 7: Build Your Activities and Achievements List
U.S. colleges care about what you do outside the classroom. Your activities list should include extracurriculars, leadership roles, sports, volunteer work, internships, part-time jobs, research, creative projects, or family responsibilities.
Admissions officers are not looking for perfection. They are looking for commitment, growth, and impact. A student with fewer activities but strong involvement often stands out more than someone with many activities with little depth.
Prepare your activities list early so you do not forget important details, dates, and roles.
Step 8: Secure Strong Letters of Recommendation
Many colleges require one to three recommendation letters, usually from teachers and counselors. Strong letters can strengthen your application, especially at selective schools.
Ask teachers who know you well and can describe your academic ability, character, and growth. Give them enough time, ideally several weeks. Provide them with information about your goals, your resume, and the schools you are applying to.
A rushed recommendation is rarely strong. Planning early makes a major difference.
Step 9: Write Your Personal Statement
Your personal statement is one of the most important parts of your application. It allows admissions officers to understand who you are beyond grades and test scores.
A strong personal statement is personal, specific, and authentic. It should focus on a meaningful experience, lesson, or personal growth. It should show your personality, your values, and your readiness for college.
Avoid writing essays that feel generic or overly dramatic. Admissions teams prefer honesty and clarity over perfection.
Step 10: Complete Supplemental Essays
Many colleges require additional writing beyond the main personal statement. These are called supplemental essays. They often ask why you want to attend that school, what you want to study, or how you will contribute to campus life.
Supplemental essays should never be copied and pasted without changes. Colleges can easily tell when an essay is not personalized. Strong supplements show that you researched the school and understand its programs, culture, and opportunities.
These essays often play a major role in competitive admissions decisions.
Step 11: Fill Out the Application Carefully
Whether you apply through Common App, Coalition App, or a school-specific portal, accuracy matters. Small mistakes can create confusion and make your application look careless.
Double-check your name, contact information, academic history, course titles, and activity descriptions. Make sure your essay formatting is correct and your writing is free of errors.
Also check whether the application requires additional forms, such as honors program applications or special scholarships.
Step 12: Submit Application Fees or Fee Waivers
Most colleges charge an application fee, but many students qualify for fee waivers. If your family meets income requirements, you may be able to apply for free.
If you qualify, request fee waivers early. If you do not, plan your budget so application fees do not become a surprise expense.
Some schools also offer free application periods during certain weeks, so check carefully.
Step 13: Apply for Financial Aid (FAFSA and Other Forms)
Financial aid is a critical part of the U.S. college process. Many families assume they will not qualify, but aid is more common than people think.
FAFSA is the main federal financial aid form for U.S. citizens and eligible residents. Many colleges also require additional forms for institutional aid, especially private universities.
Apply as early as possible. Some financial aid is first-come, first-served, and late submission can reduce your aid offer.
Step 14: Apply for Scholarships
Scholarships can reduce the cost of college significantly. Some scholarships are offered directly by colleges, while others are offered by local organizations, employers, or national programs.
Many scholarship deadlines are earlier than college deadlines. Some require essays, recommendation letters, or proof of leadership and community service.
Students who start scholarship applications early often receive better results.
Step 15: Confirm Your Application Is Complete
After submitting, log into each school’s applicant portal. Most colleges provide a checklist showing whether they received your transcripts, test scores, recommendations, and other materials.
It is your responsibility to ensure your file is complete. If something is missing, contact the admissions office immediately.
Many students assume everything was received, only to find out later that their application was incomplete.
Step 16: Prepare for Interviews (If Required)
Some colleges offer interviews as part of the admissions process. Interviews may be optional or required depending on the school.
Interviews are not meant to trick you. They are a chance to show your personality, communication skills, and interest in the college. You should prepare by researching the school and practicing answers to common questions.
If an interview is optional, completing it can still strengthen your application at some schools.
Step 17: Track Decisions and Next Steps
College decisions usually arrive between December and April depending on your application plan. Keep track of acceptance letters, waitlists, and denials.
If you are waitlisted, follow the school’s instructions carefully. Some schools allow letters of continued interest, while others do not.
Once you receive offers, compare academic programs, costs, financial aid packages, and campus support services.
Step 18: Make Your Final Choice and Commit
After reviewing your options, you will choose one college and submit your enrollment deposit by the national deadline, often May 1 for many schools.
You should also complete housing forms, orientation registration, and any placement testing required.
This is also the time to finalize financial aid documents and confirm your scholarship details.
Step 19: Plan Your Transition to College Life
Once you commit, focus on preparing for college success. Learn about academic advising, course registration, campus resources, and student support services.
If you are moving away from home, plan your budget and understand campus policies. If you are commuting, plan your schedule and transportation.